Why Trail Ratings Actually Matter
Trail ratings aren’t just labels they’re one of the simplest ways to avoid turning your hike into a rescue situation or a boring walk in the woods. Whether you’re new to the trail or a seasoned hiker, these difficulty levels help line up expectations with reality.
Think of them as a warning system and a planning tool rolled into one. A trail marked “easy” should be doable with standard sneakers and a daypack. “Strenuous”? Now you’re talking steep grades, unpredictable terrain, and possibly scrambling with both hands. Ratings help you choose the right route for your fitness level, gear, timeframe, and even mindset.
Going out underprepared for a moderate or hard hike can ruin your day or worse, get you hurt. On the flip side, over prepping for a basic trail means hauling more than you need and missing the relaxed joy of a casual trek. Smart hikers use ratings to dial in essentials right pacing, enough hydration, boots with the right grip, and layers matched to elevation changes.
Bottom line: ratings aren’t perfect, but they give you a solid baseline. They’re the first step in respecting the mountain and respecting your limits.
Common Trail Rating Systems
Understanding trail difficulty starts with understanding the system behind the rating. Multiple organizations and parks use their own grading systems while similar in purpose, they often differ in detail. Here’s what you need to know:
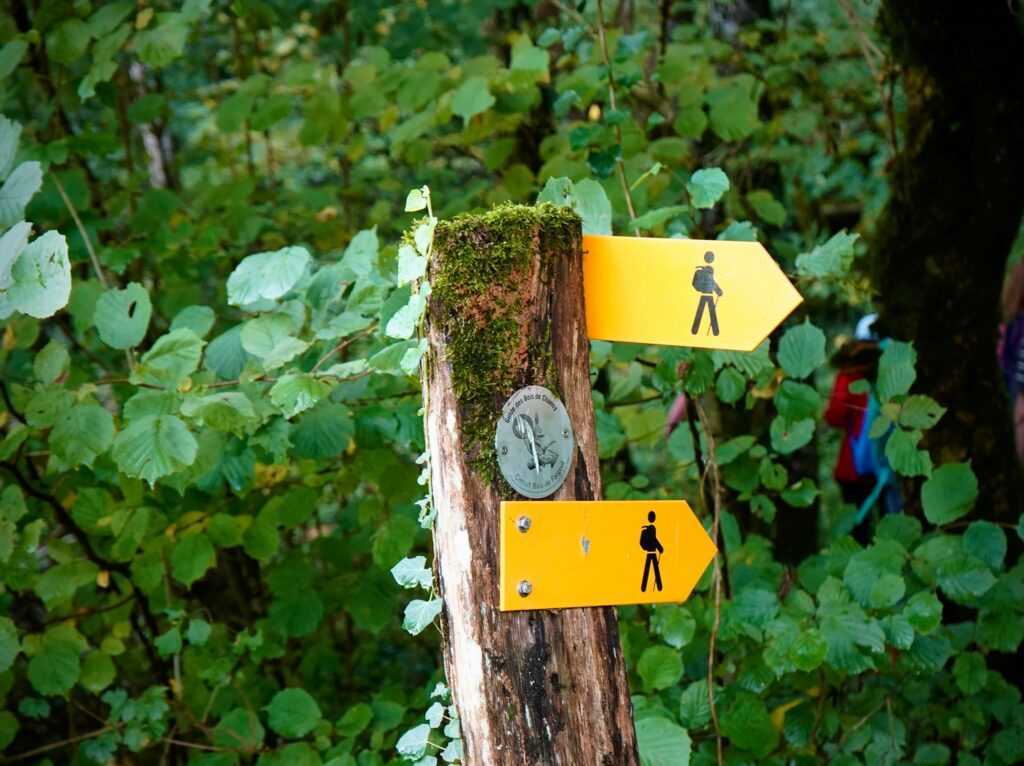
Popular Rating Systems
Yosemite Decimal System (YDS):
Primarily used in North America, especially in climbing and backcountry settings.
Ranges from Class 1 (easy walking) to Class 5 (technical rock climbing).
Example: Class 3 may require hand usage for balance, while Class 5 means ropes and climbing skills are necessary.
Swiss Alpine Club (SAC) Scale:
Common in alpine areas of Europe.
Rates trails from T1 to T6:
T1 = well marked trails
T6 = unmarked, exposed terrain requiring mountaineering skills
Local Park and Regional Scales:
Many regions have their own straightforward terms: Easy, Moderate, and Difficult.
Definitions can vary based on a park’s standards and local terrain.
Key Differences by Region
International rating systems often account for climate, terrain type, and cultural norms around difficulty.
A “Moderate” trail in Colorado might differ significantly from the same rated trail in the UK or Japan.
Be cautious when hiking abroad or in unfamiliar regions look for additional context, not just the label.
What Factors Into Trail Ratings?
Most systems consider the following variables:
Distance: Total mileage can dramatically change difficulty.
Elevation Gain: The more vertical feet you gain, the more demanding the hike. Short but steep can be harder than long but flat.
Terrain: Scree, mud, boulder fields, or smooth dirt trails each makes a big difference.
Exposure: Trails along cliffs or with no tree cover pose higher risks and demand more caution.
Trail ratings are only as useful as your understanding of them. Look deeper than the label to decide what kind of experience you’re in for.
Typical Difficulty Levels Explained
Easy Hikes
These are the gateway trails. Ideal for beginners, families with kids, or anyone who just wants to stretch their legs without sweating buckets. Expect well marked paths, minimal elevation gain, and short distances usually under 3 miles. These trails often come with creature comforts like rest stops, shade, or even gravel walkways. Perfect for casual outings or nursing your legs back into hiking shape.
Moderate Trails
Don’t let the word “moderate” fool you. These hikes can still wear you down if you’re not prepared. Think 3 7 miles with regular inclines, rocky paths, or switchbacks. You’ll need decent footwear, water, and at least some baseline fitness. These trails are great for newer hikers who want more challenge without straying into technical territory. Not a walk in the park, but you’re not mountaineering either.
Difficult to Strenuous Routes
This is where things get serious. These trails can run long (10+ miles), climb high, and throw in complex terrain loose rock, stream crossings, even scrambling. They’re for experienced hikers with the gear to match: navigation tools, weather ready clothing, food, and advanced planning. Many of these trails also require permits and demand early starts just to finish before sunset. Cardio capacity, mental grit, and trail smarts are required.
Red Flags Before Starting a Hard Trail
Don’t just go because someone on Instagram did it. Look out for elevation gain over 2,000 feet, exposure to the elements, trails with little to no shade, or areas prone to fast weather changes. Tech matters here too offline maps, charged batteries, and knowledge of bail out points. If the trail description mentions “unmaintained,” “route finding,” or “best for seasoned hikers,” take it seriously. Overestimation is a shortcut to risk.
Reading Between the Lines Not All Ratings Are Equal

Just because a trail is labeled “moderate” doesn’t mean it’ll feel that way under your boots. Hike difficulty is more than a number it’s a mix of external variables that don’t always show up on a trail app or map. A moderate trail on paper can quickly turn strenuous if the weather shifts, the path is poorly maintained, or you’re hiking at higher altitudes than you’re used to.
Snow patches, mud, slick rock, or even just heat and humidity can crank up the effort level. Add to that a few thousand feet of altitude and you’ve got a completely different kind of workout. Crowded trails can slow your pace or push you into more technical passing zones, which increases the stress of the hike too.
And then there’s the info itself. Trail ratings vary between systems and even from one local park to the next. Apps, blogs, and signs rely on subjective inputs what’s ‘easy’ to a seasoned trail runner might wipe out a weekend stroller. Your best bet? Cross reference. Read trail reviews. Pay attention to when they were posted. Ask rangers and local hikers. Don’t take a single rating as truth build a full picture before lacing up.
Planning Your Hike Based on Ratings
Understanding trail ratings is important but matching those ratings to your own ability is where good hikes begin and bad ones are avoided.
Know Your Current Fitness & Experience Level
Before lacing up your boots, take an honest look at:
Cardiovascular fitness: Can you handle long ascents or higher elevations?
Muscular endurance: Especially important for steep descents and rocky climbs
Hiking experience:
Beginners may prefer flat or well marked trails
More seasoned hikers can handle exposure, technical footing, and route finding
Make sure your chosen trail suits your comfort level, especially if you’ll be hiking solo or in changing conditions.
Gear Up According to Trail Difficulty
Not all hikes require the same setup. Tailor your clothing, gear, and fuel to match the challenge:
For Easy to Moderate Trails:
Lightweight hiking shoes or trail runners
Basic moisture wicking layers
1 2 liters of water and simple snacks
For Difficult or Strenuous Trails:
Sturdy hiking boots with ankle support
Technical layers for better weather protection
Extra hydration, high calorie nutrition, and possibly electrolytes
Trekking poles and emergency essentials like a headlamp, map, or GPS
Plan for Timing and Safety
Even well rated trails can turn dangerous if you miscalculate time or light conditions. Take time to assess:
Start early: Aim to finish the hike well before sunset
Account for pace:
Easy trails = 25 30 mins/mile
Difficult terrain = up to 60+ mins/mile
Set a turnaround time: Know when to call it and head back
Check daylight hours: Especially during seasonal shifts
By matching difficulty with preparation, you’ll hike smarter, safer, and more successfully.
Thinking Beyond Day Hikes
Day hikes can be unpredictable, but multi day routes raise the stakes. A trail labeled “moderate” might be manageable for a few hours but string it out over three days with a loaded pack, and it can wreck you. That’s why trail difficulty ratings matter even more when you’re planning to spend multiple nights out there. Cumulative fatigue, weather exposure, and terrain changes pile up quickly once the sun sets and you’re sleeping on the ground.
Think beyond elevation gain or mileage. A multi day trek demands stamina, layered decision making, and gear discipline. Your pack weight creeps into every step. Trail sections that feel fine on day one might feel brutal by day three. And if you’re dealing with snow crossings, river fords, or washed out switchbacks, a misread rating can turn dangerous fast.
Use ratings as a baseline not gospel but combine them with recent trail reports and trip journals. Know how much vertical you can realistically handle with full gear, and plan for downtime. Your margin for error shrinks when you can’t bail out at sunset and go grab dinner.
Still building experience? Check out these practical multi day trail tips to stay ready and avoid learning the hard way.
Final Prep: Don’t Let the Rating Fool You
A trail rating is a useful starting point but not a guarantee. Before lacing up your boots, dig deeper. One “moderate” trail might be a mellow stroll under trees. Another could mean scrambling over wet granite half a mile from the trailhead. Terrain, weather, and upkeep can shift a trail’s true nature quickly.
That’s why it pays to talk to people on the ground. Rangers, local hikers, and online trail reports can offer real time clarity. Is there a recent washout? Snow past mile three? Yellowjackets nesting mid path? These are details you won’t get from a basic trail sign or app rating.
Most important: measure the trail not just by its numbers, but by what you bring to it. Distance and slope mean one thing to a 25 year old trail runner, something else entirely to a parent hiking with kids. Know your physical limits. Check your experience level. And factor in how the trail might surprise you. Ratings help but smart prep keeps you safe.