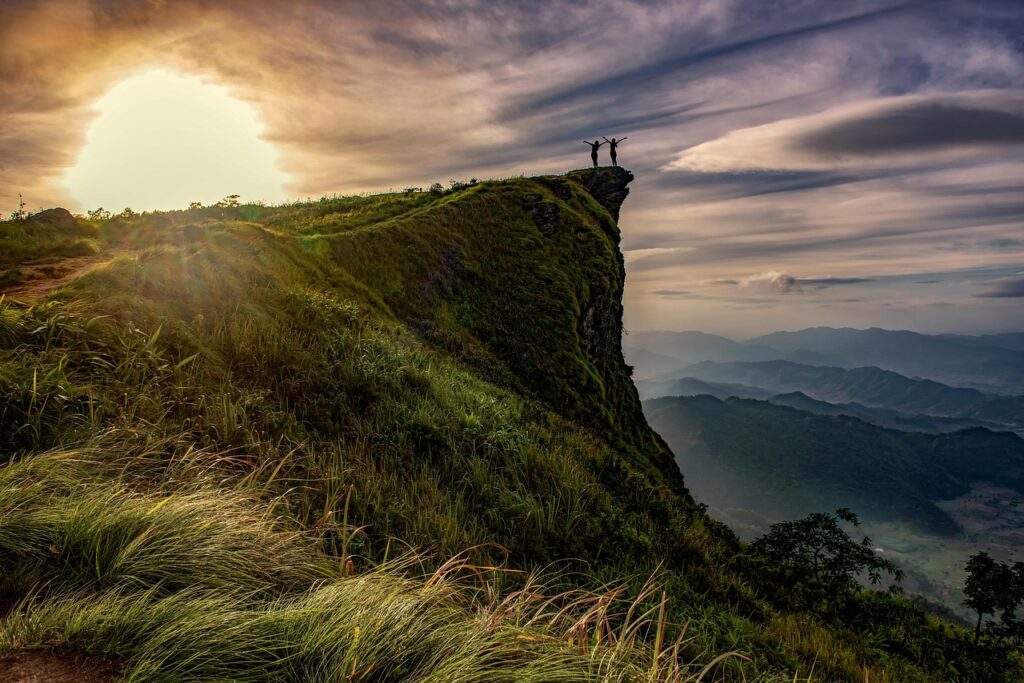
Know What You’re Dealing With
Water obstacles aren’t just water they’re terrain traps in disguise. Trekking routes often intersect with everything from ankle deep creeks to marshes that eat boots whole. First, know the difference:
Streams are usually narrow and shallow, but flash floods can turn them into hazards fast.
Rivers can look calm and still knock you off your feet. Watch for depth, current, and temperature.
Marshes are slow to cross and easy to sink into. What looks like grass covered ground is often just floating vegetation masking soft mud.
Bogs are even trickier waterlogged, acidic, and usually unstable. One wrong step and you’re knee deep with no firm bottom.
The kicker? These obstacles change personality with the terrain. A river in a valley behaves differently than one cutting down a slope. Rainfall and snowmelt can raise water levels in hours. And elevation changes how fast water moves, making highland streams surprisingly aggressive.
Bottom line: treat every water crossing as a fluid situation literally. Scout smart, and adapt your plan based on what’s in front of you, not just the map or route description.
Timing the Crossing
When it comes to river and wetland crossings, timing is as important as gear. You want to cross early in the day water levels tend to be lower in the morning before snowmelt or heat driven runoff kicks in. Afternoon sun raises temps, which increases snowmelt and drainage flow upstream. That extra volume can turn a manageable stream into a borderline hazard by the time you reach it.
Seasonally, late summer through early fall is usually your best bet. Snowmelt has settled, monsoon patterns (if they apply to your area) are tapering off, and water temperatures aren’t quite as punishing. Spring, on the other hand, is a gamble. Runoff can vary wildly depending on weather shifts, and river behavior is harder to predict. If you have no choice but a spring crossing, do your homework.
To spot rising water, look for silt clouds in previously clear water, floating debris, and audible increases in current volume. Wet rocks or changing waterlines along riverbanks can signal a recent jump in depth. Don’t ignore these markers. Water rising even a few inches can triple force and your risk.
Drainage patterns also matter. Basins or terrain “bowls” collect runoff differently. A sunny day after rain isn’t free of trouble water may still be flowing down toward your path with a delay. Know the terrain behind your water source. Check maps. Assume a lag in response time between weather and water level. Patience can be the difference between a clean crossing and a rescue call.
Choosing Where to Cross
When it comes to river and wetland crossings, where you choose to step in makes all the difference. Go slow, go shallow, go wide. Fast water can knock your balance in moments. Deep sections hide hazards. Narrow channels often mean faster currents. You want something broad, gently flowing, and calm on the surface.
Start by scanning for clues. Eddies the swirling patches near rocks or bends signal uneven flow. Discolored water may hide depth changes or debris. A steady rush or boil in the middle? That’s a no go. Use your ears too; noisy water tends to mean turbulence, and turbulence means risk.
Never cross upstream of anything you wouldn’t want to be swept into think waterfalls, rapids, or logjams. They’ll pull you in faster than you think and leave no room to recover. Always spot your downstream line of sight and plan an escape if things go wrong.
Before stepping in, test what’s underfoot. Sand packs firm, rocks can shift. Mud sucks boots and ankles. Take a minute to probe with a trekking pole or stick. Stable footing is the foundation of a safe crossing, and guessing wrong can mean more than wet socks it can mean injury.
Pick your point like your safety depends on it. Because it does.
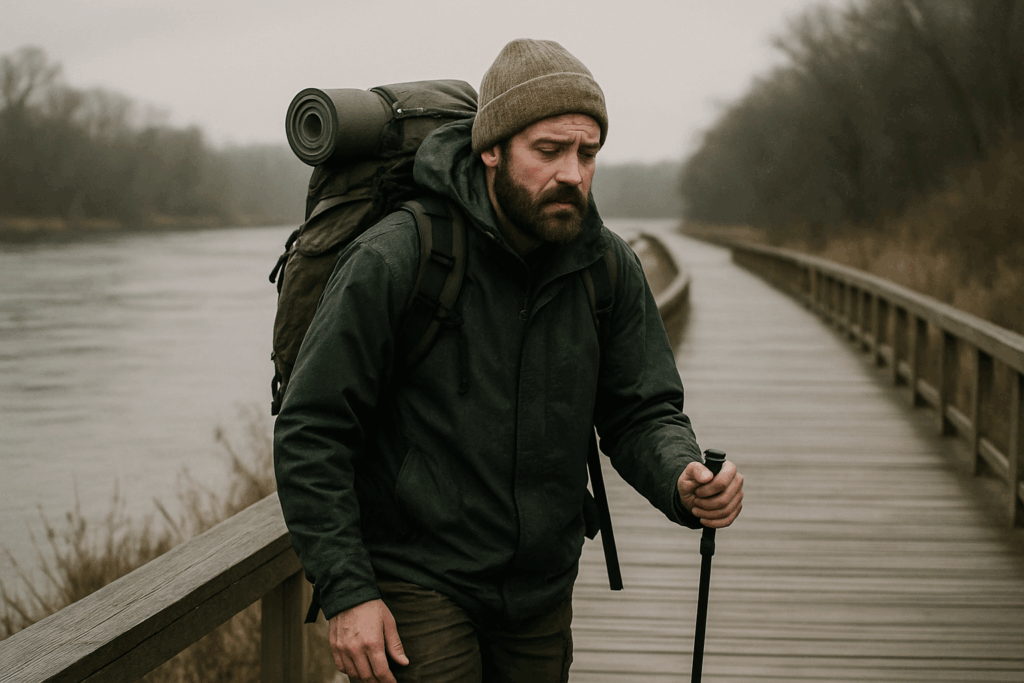
Gear That Works Hard
When you’re facing a river or soaking hike through wetlands, your gear stops being a comfort and starts being a survival issue. What you wear matters.
First, ditch anything cotton. It holds water like a sponge and pulls your body temp down fast. Go with synthetic or merino wool layers they keep you warm even when soaked. Shorts or fitted pants that dry quickly are smarter than baggy anything, which catches water and drags. Strip down only to what you’re willing to get wet and deal with later. Sometimes less is safer.
Waterproof your gear like you know you’re going in. Standard issue ziplocks won’t cut it. Use proper dry bags or compression sacks with waterproof roll tops. Think redundancy: electronics in small dry cases inside a sealed pack liner. You don’t want to gamble with batteries, maps, or meds.
Trekking poles? Definitely take them. In water, they’re more than extra legs they’re probes that help test depth, current strength, and bottom quality. That said, cheap poles can bend or snap under pressure. If you’re bringing poles, bring ones that won’t fail when you lean on them.
Now, shoes. Sturdy footwear with good grip matters more than you think. Forget flip flops or barefoot. You need foot protection on sharp rocks, and ankle support for slippery exits. Trail runners with aggressive treads or lightweight hiking boots excel here. Drainage is key wet shoes are a given, but drying fast makes the difference.
Don’t treat your gear like accessories. In crossings, they’re your lifeline.
Basic Crossing Techniques
Before you ever set foot in the current, you need to get your balance right. Practice walking slowly on uneven ground with your pack on. Bend your knees slightly, keep your center of gravity low, and test each footstep these basics matter. If you’ve never waded through fast moving water, you don’t know how quickly confidence turns into panic. Repetition builds competence, and competence is what keeps you upright when that icy flow hits your thighs.
Crossing with a group is usually safer more legs on the ground, more stability, more eyes to spot hazards. Link arms or use pack straps, stagger your steps, and move in sync. But in tight, technical crossings, solo might be cleaner. You’re smaller, more agile, and if you go down, you’re not dragging others with you. Decide based on the terrain, not ego.
Use what you have and do it early. A floating line rigged downstream can act as both safety and guide. Rope assists let lead crossers anchor support for the rest. Makeshift poles thick branches or a solid stick are better than nothing. Plant it upstream and lean into it step by step. Think of it as a third leg that doesn’t mind getting wet.
After the crossing, drying out fast is key. Strip wet layers, wring them out, get moving again if it’s warm. If it’s cold, set up shelter and get dry clothes on no shortcuts. Hypothermia doesn’t care how tough you are. Carry high calorie snacks and a heat reflective layer in a dry bag. A small fire, if you can safely build one, helps. But speed is survival. Don’t sit there waiting to shiver.
Smart crossing is about preparation and mindset. Confidence isn’t noise it’s quiet, steady, and trained.
Wetlands: The Creeping Challenge
Wetlands aren’t dramatic, but they’re brutal in their own way. There’s no splash, no current but they drain energy fast. Every step in a bog or marsh sucks at your feet, doubling effort and slowing your pace. Muscles work harder for less distance, and cold, damp conditions can lead to cramping or hypothermia if you’re underprepared. Sprains happen often, usually from missteps into pockets of deep muck or tangled root systems hiding beneath the surface.
The key to crossing safely is route choice. Never charge straight in. Look for established game trails; animals often find the safer paths. Feel the ground with a stick before committing your weight. If it moves like pudding, back off. Prefer tufts of grass, firmer ground, or dead vegetation mats they spread your weight better than bare mud. And if underground water is bubbling or the vegetation suddenly changes, you’re probably stepping into a sinkhole. Don’t.
Also, tread lightly. Wetlands are ecosystems, not obstacles. A wrong footed shortcut can destroy nesting grounds or rare plant life. Use existing footprints or raised paths if available. And if you’re moving as a group, spread out to avoid compacting a single route.
Need more tactics? The full river crossing guide breaks it all down gear, technique, exit strategies. Worth a look before your boots hit the mire.
Mistakes That Get People Hurt
Crossing water isn’t just about guts it’s about reading the situation and acting with precision. Blow past that, and the consequences hit hard.
Rushing a crossing without scouting is asking for trouble. Even knee deep water can become a trap if the current’s fast or the bottom’s unstable. Take the time to study your options. Look upstream and downstream for safer zones wide, shallow spots with visible bottoms and slower movement. It’s worth ten minutes of prep to avoid a cold, panicked swim.
Then there’s underestimating the water’s power. Moving water multiplies in force the deeper and faster it gets. Two feet of water with decent flow can knock your legs out from under you. Don’t let clear water fool you it’s not a swimming pool. Trust friction, not confidence.
Another big one: carrying too much or carrying it wrong. A heavy pack with a high center of gravity turns you into a tipping tower mid crossing. Stash heavy gear low, reduce bulk where you can, and unclip chest and waist straps you want to be able to ditch it fast if you fall.
And lastly, getting soaked too early in your trek can drain your energy and morale. Wet clothes chafe. Wet feet blister. Wet gear weighs you down. Whenever you can, delay crossings until later in the day, or shift your route and keep dry for as long as possible.
Crossing water is never just a step and splash. It’s risk management in motion. Fail to respect it, and you’ll be lucky if discomfort is the only price you pay.
One Final Thing: Always Plan for the Unexpected
No matter how solid your prep is, rivers and wetlands have a way of surprising you. Before you cross, identify retreat options places upstream or downhill where you can safely back out if the water surges or footing gets dicey. A rock shelf, a gravel bar, even a thick stand of brush can give you cover and time to reassess.
If someone gets swept away, resist the instinct to jump in after them. That turns one casualty into two. Instead, shout and point so others can track the person and throw them something that floats. Use a rope if you have one secured. Get them to calmer water before attempting any rescue.
Signal kits aren’t just for show. Bright flags, light mirrors, and loud safety whistles can help you get attention fast if things go sideways. And don’t skip the waterproof first aid kit. Hypothermia, cuts from submerged debris, or busted joints from bad landings are real threats. Dry bandages, thermal blankets, and wound disinfectants should always ride high and dry in your pack.
Preparedness looks boring until it’s the difference between a story and a tragedy. For more in depth safety techniques, check out our full river crossing guide.
 There is a specific skill involved in explaining something clearly — one that is completely separate from actually knowing the subject. Thomason Hardingangers has both. They has spent years working with yiganlawi terrain expedition guides in a hands-on capacity, and an equal amount of time figuring out how to translate that experience into writing that people with different backgrounds can actually absorb and use.
Thomason tends to approach complex subjects — Yiganlawi Terrain Expedition Guides, Nature Trek Insights and Basics, Outdoor Survival Gear Tips being good examples — by starting with what the reader already knows, then building outward from there rather than dropping them in the deep end. It sounds like a small thing. In practice it makes a significant difference in whether someone finishes the article or abandons it halfway through. They is also good at knowing when to stop — a surprisingly underrated skill. Some writers bury useful information under so many caveats and qualifications that the point disappears. Thomason knows where the point is and gets there without too many detours.
The practical effect of all this is that people who read Thomason's work tend to come away actually capable of doing something with it. Not just vaguely informed — actually capable. For a writer working in yiganlawi terrain expedition guides, that is probably the best possible outcome, and it's the standard Thomason holds they's own work to.
There is a specific skill involved in explaining something clearly — one that is completely separate from actually knowing the subject. Thomason Hardingangers has both. They has spent years working with yiganlawi terrain expedition guides in a hands-on capacity, and an equal amount of time figuring out how to translate that experience into writing that people with different backgrounds can actually absorb and use.
Thomason tends to approach complex subjects — Yiganlawi Terrain Expedition Guides, Nature Trek Insights and Basics, Outdoor Survival Gear Tips being good examples — by starting with what the reader already knows, then building outward from there rather than dropping them in the deep end. It sounds like a small thing. In practice it makes a significant difference in whether someone finishes the article or abandons it halfway through. They is also good at knowing when to stop — a surprisingly underrated skill. Some writers bury useful information under so many caveats and qualifications that the point disappears. Thomason knows where the point is and gets there without too many detours.
The practical effect of all this is that people who read Thomason's work tend to come away actually capable of doing something with it. Not just vaguely informed — actually capable. For a writer working in yiganlawi terrain expedition guides, that is probably the best possible outcome, and it's the standard Thomason holds they's own work to.